Audio Reactive FX 04 presents a Niagara particle effects package designed for audio-reactive music visualization. With a focus on creating tentacle and worm-like arrangements of particle meshes, this pack offers a range of stylizing options using textures and an abundance of customizable parameters. Ideal for live music events and music videos, the included blueprints for audio capture and playback simplify the process of incorporating dynamic, visually-engaging audio elements into your performances. Upgrade your music and enliven your visuals with Audio Reactive FX 04.
Unreal Engine Marketplace Link
Audio Reactive FX 04 is a comprehensive collection of 55 Niagara particle effects that bring your music to life with stunning visuals. This versatile asset pack offers a range of customizable features, including Niagara modules, materials, and material functions, all of which can be easily reused. The procedurally generated effect materials allow for effortless mesh replacement without the need for UV mapping. Whether you’re performing live or creating music videos, Audio Reactive FX 04 is the ideal tool for elevating your audio and visually captivating your audience.
Example Videos
Check out the full potential of Audio Reactive FX 04 by visiting our YouTube channel, where you can see a collection of mesmerizing video examples using these assets.
Demo Video

Overview video

Features
- 55 unique Niagara systems with (10 base systems and 45 variations to show the customizability). Each of them having between 20 and 90 parameters for styling.
- 3 Blueprint Tools: audio capture, audio playback, sample texture from material
- 25 reusable Niagara module scripts
- 9 Materials
- 19 Material Instances
- 6 Material functions
- 21 Textures (define niagara effect behavior & coloring)
- 7 Meshes. Very basic shapes. You can add your own
- 49 Color Curves
- The majority of parameters (except things like materials) can be animated in the sequencer.
- Audio reactions include: color gradient, emissive, size change, wave motions, animation speed change
- Most effect have a fixed number of particles. No surprise bursts that drag down performance.
- Most effects run on GPU. Exceptions are ribbon systems as they require CPU access
- Blueprint for audio capture actor. Simply put in your map to enable audio capture. Capture can use everything that is heard or use specific audio mix. Thus it can be enabled for music only or voice chat only etc.
- Blueprint for audio playback that plays automatically in editor and game.
- Blueprint to sample a procedural material to a texture.
Setup
Installation & Contents
After downloading the asset pack. Create a new project or add it to an existing project via the Epic Games Launcher. In both cases you will get an “AudioReactiveFX04” folder in your project which contains the following folders
- Blueprints/Tools: contains the 3 tool actors
- Blueprints/: contains 3 demo blueprints that demonstrate how to use the effects with splines.
- LevelSequences: contains the level sequences which were used to render the previews
- Maps: contains 2 maps. The first map contains all effects, created from it’s base Niagara System. In the second map, each effect is replaced by a Blueprint that holds the base Niagara system and has all settings for the unique variation of the effect. If you want to use the effects in a packaged build, use the effects from the 2nd map.
- Materials: contains materials that are used by the effect assets as well as the used material functions, material instances and color curves
- Meshes: contains the used meshes
- Niagara: contains the actual effects which are Niagara systems. also contains Niagara module scripts
- Sounds: contains a short demo sound loop payed on the demo map
How to use the effects
The Maps folder in Audio Reactive FX 04 contains examples of how to use the assets effectively. Each audio-reactive asset has a parameter called AudioSpectrum, which allows you to choose the audio submix that the effect will respond to. Submixes are essentially different audio channels that can provide different audio sources, such as music, sound effects, or voice chat. If no submix is selected, the effect will respond to the project’s master submix by default. If your project is newly created or has its default settings, this means that the effects will respond to all in-game audio.
The demo maps include an instance of the “BP_AudioPlayer,” which plays a short loop of music so that you can hear the effects respond when the map is opened. If you’d like to remove the sound, simply select the “BP_AudioPlayer” actor in the map, choose its audio component, and clear the Sound property.
How to enable audio react from microphone & line-in
- Connect a microphone to your PC (USB or audio plug) or connect an audio source to your PCs line in.
- Open up your project in Unreal Editor or create a new project.
- Drag an “BP_AudioCapture” from the Blueprints/Tools folder into the map. This will instantly enable enable audio capture. This means if you have a microphone connected, the effect should react to your voice. If you have an external audio source on the line in, the effect should react to it. Note that both are possible simultaneously.
- place the audio reactive effects you want in your map. they should now all react to the captured audio.
How to enable audio react from your own audio file
- Open up your project in Unreal Editor or create a new project.
- Add your audio to the project. To do this, drag a supported audio file (WAV, Ogg-Vorbis, AIFF or FLAC) from your file browser into the content browser. You should now have a SoundWave asset in your content browser.
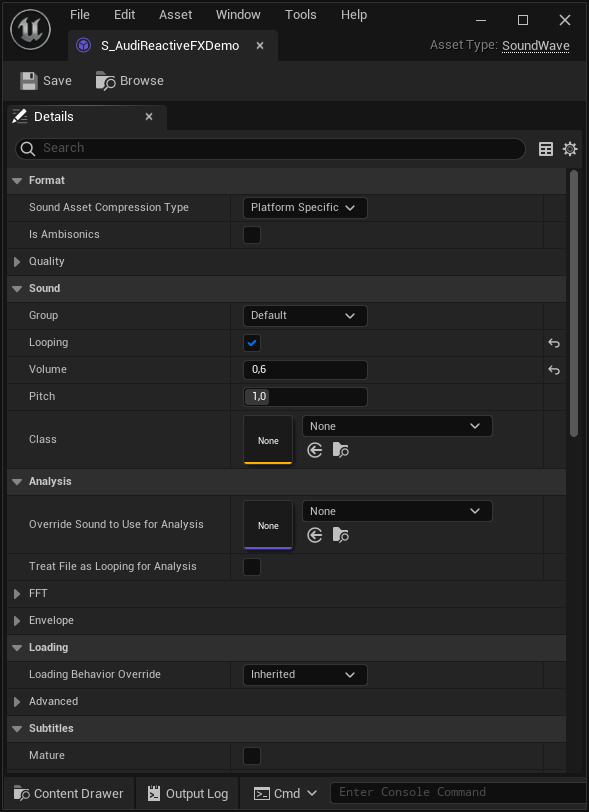
- If you want to make the sound looping, right click the SoundWave asset and select “Edit…”. This opens up the sounds settings like in the following image. Check the “Looping” checkbox and save the SoundWave asset.
- Now drag the “BP_AudioPlayer” blueprint from the content browser into your map. This will create a “BP_AudioPlayer” actor in the map.
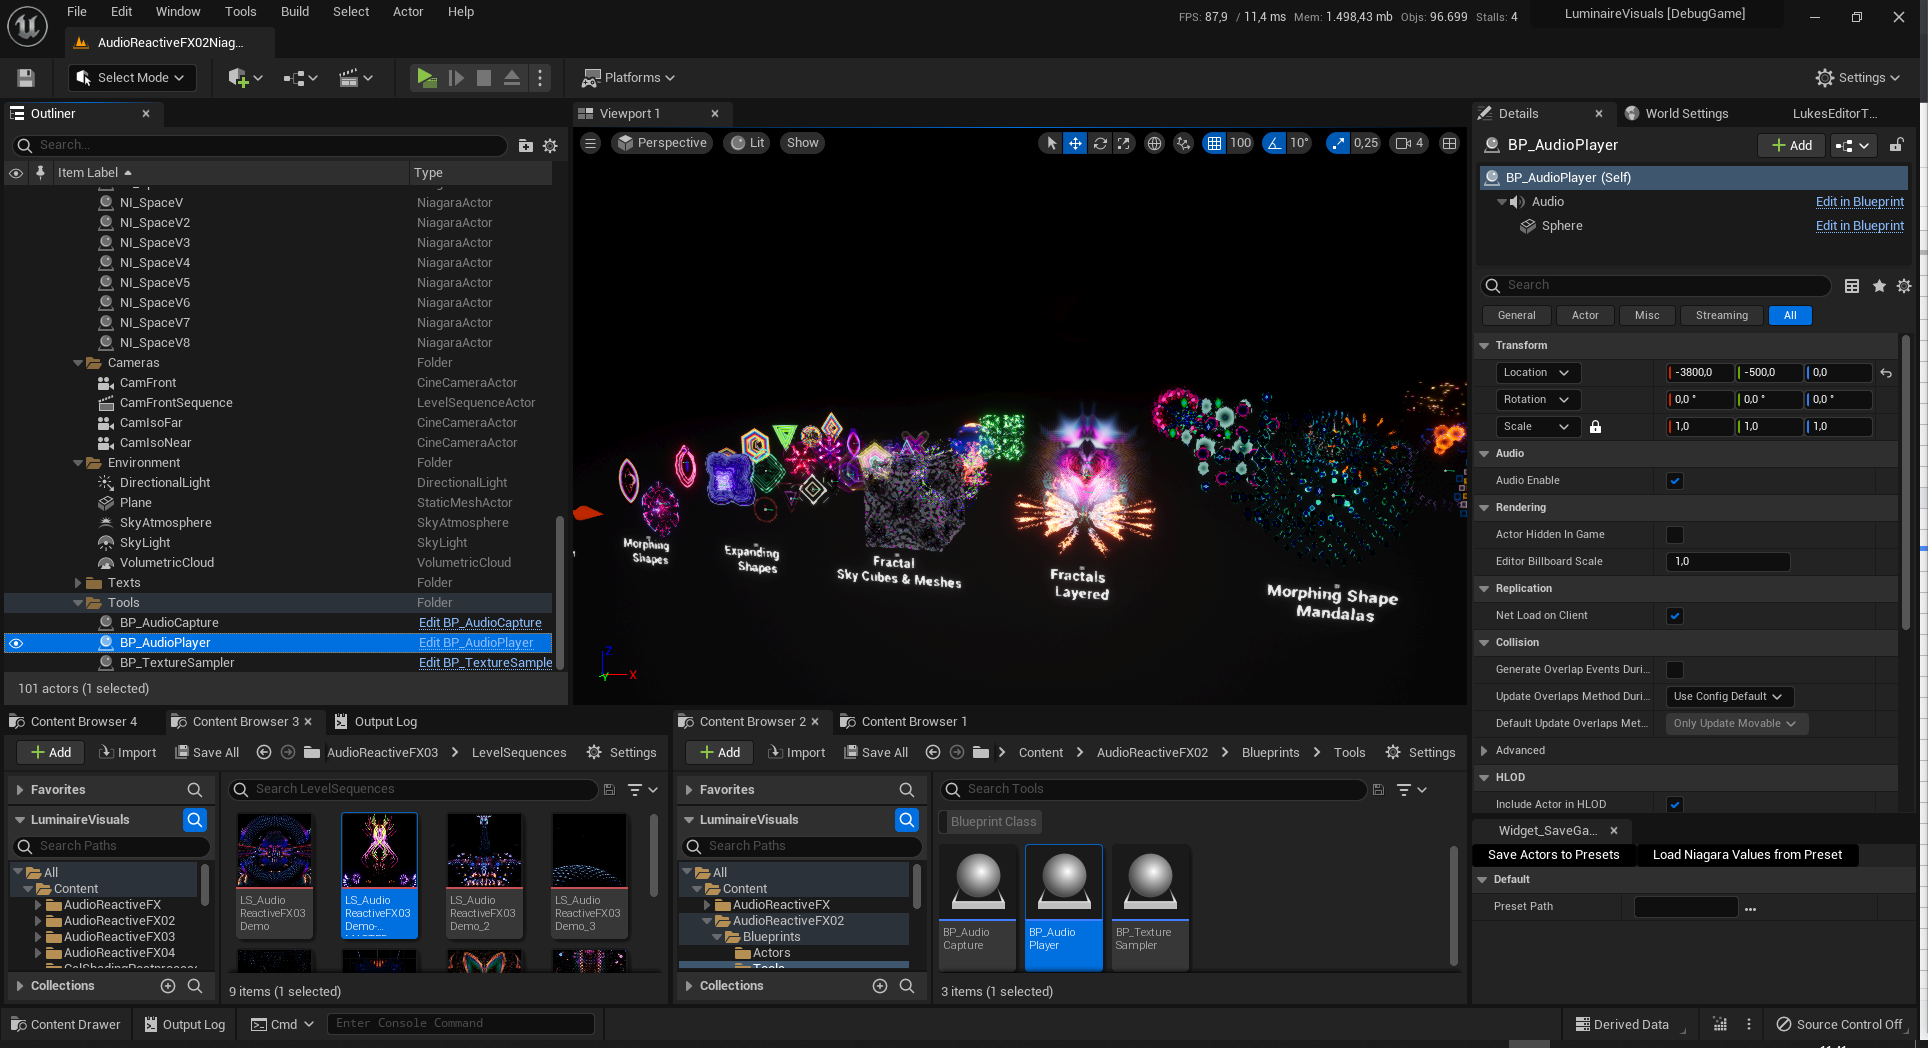
- Select the newly created “BP_AudioPlayer” actor in the map like in this picture, showing the demo map. You can select it in the viewport or from the outliner window. (Note that the image shows effects from another pack)
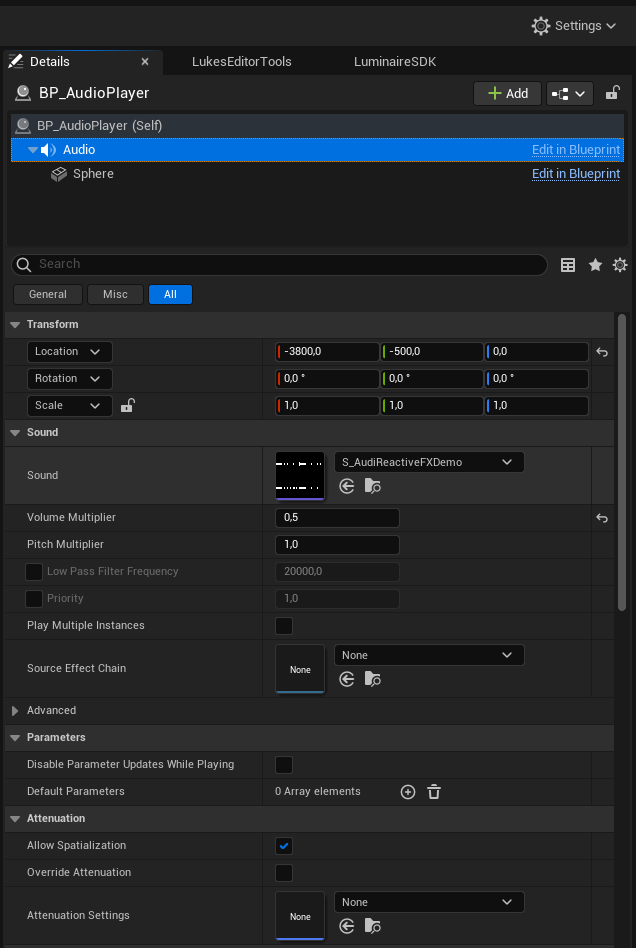
- Now you will see the BP_AudioPlayer’s details in the details panel of the editor like shown in the following image.
- Select the “Audio” component in the details panel like shown in the image. Note the “is UISound” checkbox. If this is enabled, it is always played like a global background sound. This is enabled by default. When disabled the playback has to be started manually. This can be triggered from blueprint, c++ code or other editor tools like the sequencer.
- To set your own audio you can either drag the previously created SoundWave asset from the content browser to the “Sound” property or you can open the dropdown and select one of the supported assets there. The next two images show both ways.


- Once you have set your own audio it will start to play (when the “Is UISound” checkbox is still checked). When the sound is set to be looping, it will play in endless-loop.
- if it does not start to auto play the audio, check the “Is Playing” checkbox of the AudioAnalysisTool actor.
How to enable audio react from in-game sounds
To make the effects respond to in-game sounds like sound effects and music, you’ll need to select the appropriate audio submix. This can be done in the Details panel of the effect. To access the panel, select the effect in the map (either in the viewport or in the Outliner), and navigate to the “Override Parameters” section. Once there, expand the “AudioSpectrum” property to reveal the “Submix” parameter. From there, you can select the desired submix, and the effect will respond to the corresponding audio source.
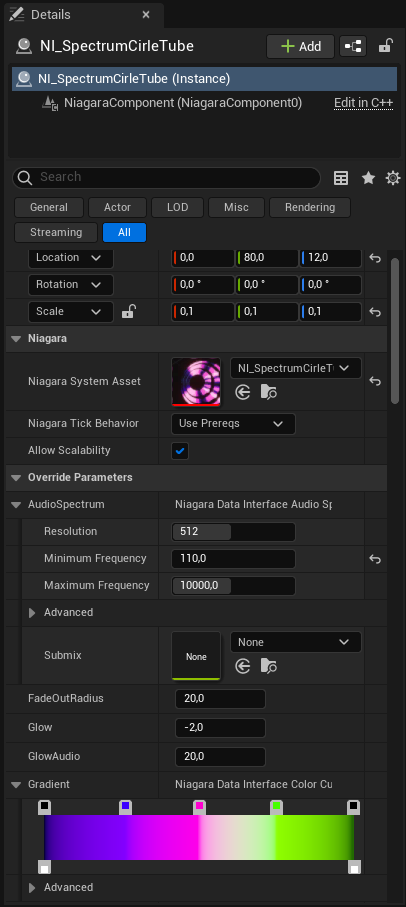
- If you play all music and sounds without a submix set (empty property) or with the project’s default submix, then you don’t need to change the submixes on the audio reactive effects. You can leave the submix parameter inside the AudioSpectrum property of the effect empty and it will automatically listen on the project’s default submix.
- If you divide your ingame audio into different submixes like music, sound effects, voice chat etc. you will need to set the correct submix in the submix parameter inside the AudioSpectrum property of the effect. For instance if you have a MusicSubmix for background music, you can set this MusicSubmix and enable the effect to react to the background music only.
If the effects do not react to audio
- ensure that there is audio in game. you can use the AudioAnalysisTool to playback sounds or to capture audio (see the previous sections)
- check the submixes of the effects. select the effects and expand the AudioSpectrum property. There is a submix parameter. If this is empty, the effect will listen to the master submix that is set in the audio section of the project settings.
- if multiple submixes are used in the game, be sure to select the correct submix for the effects and also be sure that the actual audio sources like music and sound effects send to the correct submix
Common effect parameters
There are some common effect parameters, that are shared by most of the effects. These are
- AudioSpectrum: defines the submix to analyse, spectrum resolution, min and max frequency
- AudioThreshold: the audio amplitude needs to exceed this threshold to have a visual effect. set this to 0.1 or 0.2 to cancel low volume noise if needed
- GradientIndex OR ColorGradient: defines which gradient to use. See the “CurveAtlas_Color_01” in the “Materials/ColorCurves” folder to get the order of gradients. When new gradients are added, change the “NumberOfCurveAtlasCurves” in the “MPC_GlobalMaterialParameters” asset in the “Materials/MaterialParameterCollections” to be the same number as the number of gradients in the atlas. If this is not done, some of the effects might take the wrong gradients.
- GradientMinimum & GradientMaximum: when these are present, they can be used to stretch the used gradient to better fit the audio.
- SpectrumRangeStart & SpectrumRangeEnd: use to set the range of the spectrum analyzer, where 0 corresponds to the MinimumFrequency and 1 to the MaximumFrequency
- Parameters with “Emissive”,”Glow” or “Brightness” have an effect on the glow behavior
- Parameters that start with “SpectrumTo”, or end with “FromAudio” control the effect of the audio spectrum on various other parameters
Note that parameters that end on “_RESET” will need to reset or rebuild the actor ingame if changed at runtime. Otherwise the parameter change will not take effect. You can ignore this if you do not change the parameters at runtime in a packaged build.
Some effects are based on one of the contained Niagara emitters in the Emitters folder. These can be used to create similar effects.
Using Splines
Some of the effects can use splines to follow their path. These effects usually may have “spline” in their name or have a parameter named “LineInsteadOfSpline”. The parameter turns off the spline follow functionality and uses a parametric line instead. This is usually enabled by default as the spline can only be added in a map and not in the particle editor. Thus, following a non existent spline would lead to a glitching effect. If you want to use a spline simply add a spline to the actor that holds the Niagara effect in the map. To be totally safe you can make the spline the parent in the actor’s hierarchy. This can also be done in blueprints. A few blueprints with splines and effects are contained in the pack to demonstrate how it is done.
Frequently asked questions
Rendering with MovieRenderQueue
To render with Movie Render Queue check the following steps:
- Have a level sequence with your desired audio in it
- Set temporal & spatial count to 1 in anti aliasing settings (otherwise the audio is played way faster)
- Sequence and the render settings must have the same fps rate set to have audio and video in sync
In UE5.0 the audio and video still did not match every time. In most cases it worked out of the box but sometimes it would not work regarding the efforts. This may have changed in subsequent versions of the engine.
Contained Assets
Tools
- BP_AudioCapture: starts capturing audio from external sources as line-in or microphone when added to the world. Effects can react to the audio.
- BP_AudioPlayer: starts playback of an audio file when added to the world. Effects can react to the audio.
- BP_TextureSampler: When selected in the map, a source material can be set in the details, as well as a target render target. In addition , there is a button in the details to render the material to the render target. this can be used to “bake” complicated materials to textures.
NI_MeshTube
This asset provides particle meshes arranged in a tube-like fashion that can be viewed from both the inside and outside. The tubes can follow a customizable line or a spline, and can even be mirrored for added versatility. The mesh type, color, and audio reaction are determined using grayscale textures, while the wave motion adds an extra level of interest to the tubes. The result is a dynamic and engaging audio-visual element that can be used in live music events or music videos.
NI_MeshTubeGrid
This asset creates 3D particle worms in a box-shaped grid. Unlike “NI_MeshTube,” which features one or two tubes, this asset creates multiple tubes arranged in a 3D structure. The worms move in a specific direction, and when they reach the border of the box, they disappear and reappear on the opposite side. The movement of the worms resembles a sine wave.
NI_RibbonTubeGridHex
This asset, similar to “NI_MeshTubeGrid,” creates 3D particle worms using ribbon tube renderers instead of small meshes. Due to the limitations of technology, the evaluation of this system must occur on the CPU instead of the GPU as ribbon calculations are currently not supported on the GPU. Each ribbon has the option to display an outline, and a dot pattern is applied to the tubes.
NI_RibbonTubeGridTruchet
This asset is similar to “NI_RibbonTubeGrid” but the tubes have a truchet pattern applied. This is a pattern that looks like a simple maze drawn by perpendicular lines.
NI_RibbonTubeGridTextured
This asset is similar to “NI_RibbonTubeGrid” but the tubes have a material parameter that enables switching of the used material. To use new materials, copy the default material that is used and then set a new texture in the newly created material instance asset. Used textures should be grayscale images. When used by the effect, color gradient and spectrum reaction are based of the value of the texture at each position on the tube. Range of the color gradient can be changed with the StepMin and StepMax parameters. Also negative values are allowed.
NI_SpectrumRibbons
This system features a basic 3D spectrum analyzer, which displays the audio buffer’s spectrum on one side and moves to the other as time passes. The user can adjust the number of past spectra displayed and the resolution, and the spectrum can be displayed using ribbons, sprites, or meshes.
NI_SpectrumTentacles
This system generates a grid of tentacles, composed of ribbon rings, that move in a specific direction. At the end of adjustable bounds, the tentacles disappear and reappear on the opposite side. The ribbon rings respond to audio inputs by changing color, width, and ring size. The tentacles are mirrored in the x-direction and the quantity and appearance of the tentacles are highly customizable.
NI_TentacleForestGPU
This asset presents a grid of tentacles, with meshes placed on their surfaces, that react to audio inputs. Gray scale textures are utilized to determine the size, mesh type, movement phase, and coloring of the tentacles. The tentacles are grouped into various batches, each reacting to different audio frequencies for added visual variation. An extensive range of parameters are available to customize the movement and appearance of the tentacles.
NI_TentacleForestRibbons
This asset is similar to “NI_TentacleForestGPU,” but instead of using meshes on the tentacle surfaces, it employs ribbon tubes. As a result, the system must be rendered on the CPU, rather than the GPU.