LUMINAIRE VJ
Windows x64 – Preview Demo Build
Join our Discord server

Consider Donating <3
About
Luminaire VJ is currently in inofficial beta. You can download the preview build and use the full functionality. You will discover issues but loading a map and playing it for small gigs will usually work if you just let it run. for feature requests and support please join the discord 😉
Features
- Interactive Realtime 3D Visuals: powered by Unreal Engine
- Multiple Layers: Each layer can have multiple assets that are played back in sequence or randomly.
- Audioreactive: Most assets are audio reactive. Attach a microphone or connect an audio device via line-in to enable
- 26+ Assets: Comes with 26+ assets that are highly customizable. New assets will be added in future versions
- Autopilot: Enable the autopilot to automatically transition between assets, based on musical beats or bars
- Presets: Save any changes made to assets as preset for later reuse
- Save Changes: Save any changes you made to the maps as new maps
- NDI Output: Each camera you create can send an NDI signal. Simply set the NDI checkmark in the camera’s settings
Roadmap
Since the release of the preview build we updated to UE5 and made a lot of fundamental changes that are needed for planned features. Finishing these features will take some time. Our goal is to provide a fully functional application with the next release. So stay tuned. For feature requests and news join our discord
Next Release
These are mandatory features. We won’t publish a new version without these. So please be patient for us to finish <3
- Import UE5 Content & SDK: We are currently working on an SDK for the application. This will be an UE5 project that includes all the neccessary components to create new maps and content for the application. This allows to import your own content or content from the UE marketplace into the application
- In-App Shop: Since we want to make some money at some point we have created an in-app shop for content and features. This is mostly done but needs polishing. further down the road we want to allow user generated content so you can also sell your own content. But this extended feature will not be part of the next release.
Future Releases
These features are on our list and we want to add them. Feel free to discuss them on our discord
- Layer Thumbnails: You probably want to see how the parts look before you play them 😉 we know but this feature will take some time as assets can change dynamically and we want to have thumbnails that are correct and do not show the wrong thing.
- DJ Player Input: Receiving of JD Player timecode to automatically sync the visuals. This is a huge task so it is definitely further down the road.
- Camera Control: Currently cameras are static. so if you want movement, the assets need to move. We want to add camera movements like dolly movement or spline based movement
- Other Streaming Protocols: if we see demand for other protocols than NDI we are happy to add them. Let us know what your needs are
How to operate
Installing Luminaire VJ
After downloading, install the application. You need to click on “Further Information” to ignore the Windows untrusted software warning. The warning pops up because i have not had bought a certificate when this version was packaged. After installation you can start the software.
Account Login

When you open it the first time you will need to make an account. For this preview version this just helps me to contact interested people later on but in future versions there will be content linked to your account.
Once you logged in you can skip login for 20 days in case you are offline and can not connect to the internet.
Loading a map
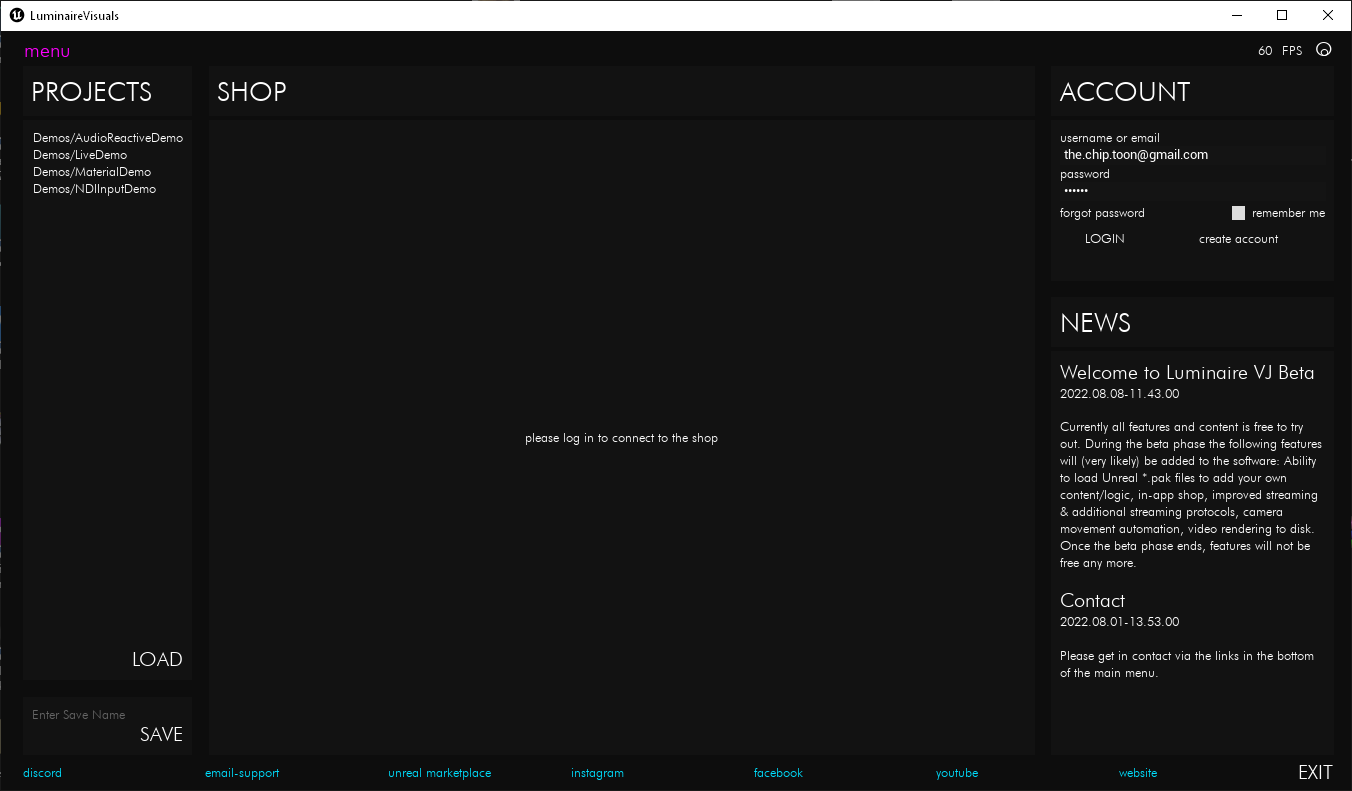
This will be the starting screen. You can load factory maps on the left side under “Projects”. Also saved maps will appear here. Load the “LiveDemo” to start.
Editor View
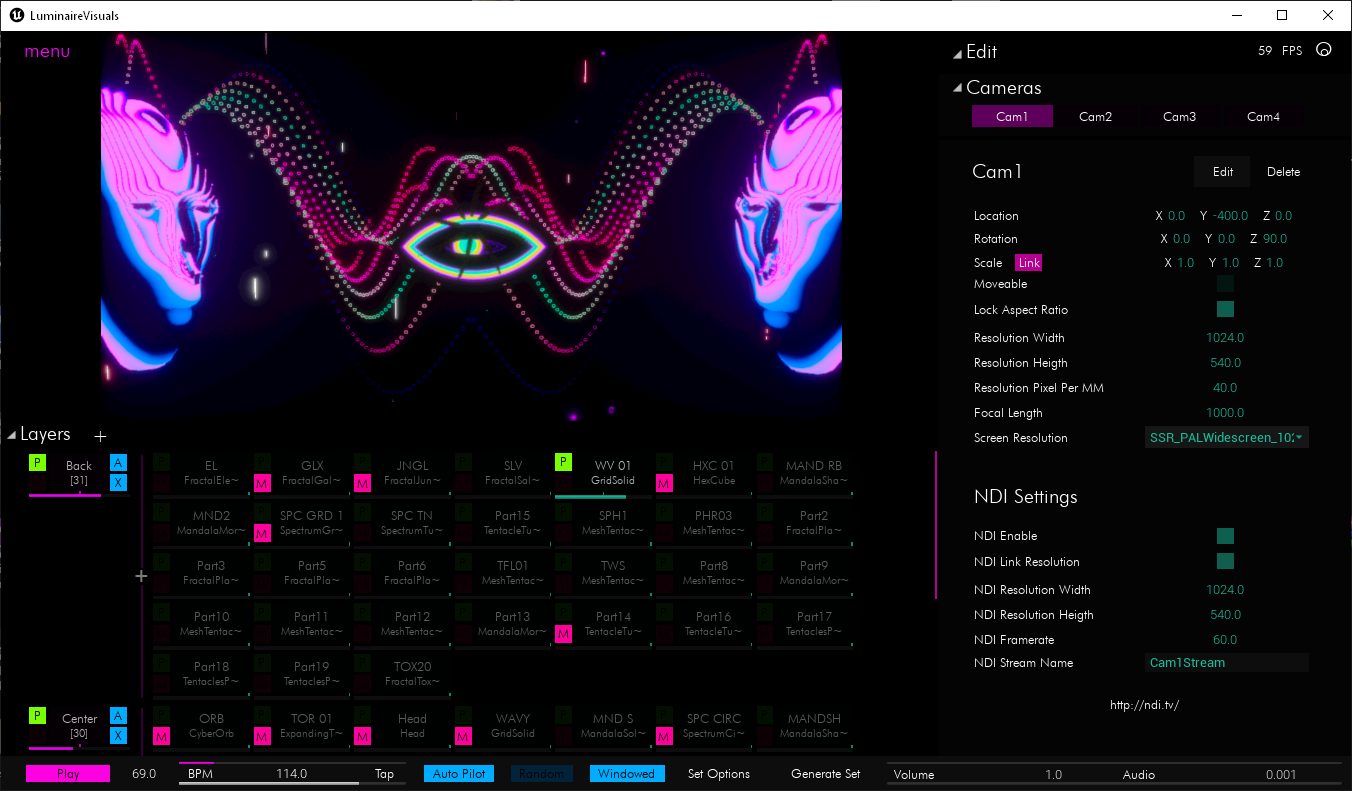
Once the map is loaded you will be shown the editor view. Here you have all controls for a live session.
- In the top left you get back to the menu
- the top left center shows the current camera view if in windowed mode. Otherwise the camera view is shown as the whole application background
- the middle left shows the layer and part controls to select whats playing
- the top right panel shows available cameras
- the center right panel is the editor for the selected object
- the bottom panel shows the BPM/Transport controls and audio volume
The Layer Panel
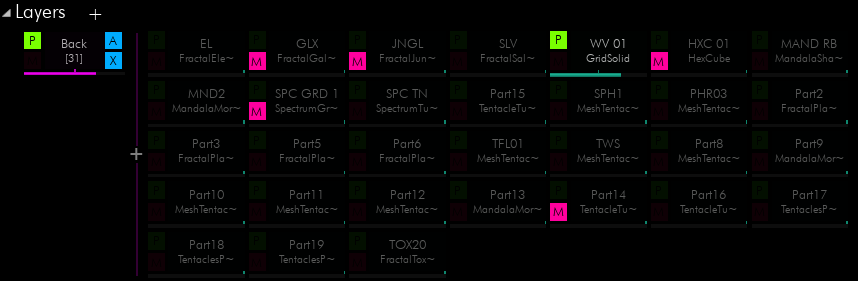
In the layer panel you can:
- create new layers by clicking the + next to the Layer label
- create new parts by clicking the + in the purple line after the layer card
- play layers or parts by clicking the “P”
- mute layers or parts by checking the “M”. muted layers and parts are not autoplayed
- set the layer to autoplay by checking the “A”
- set the layer fade to crossfade by checking the “X”. if disabled one part is finished before the next is startet. If enable the next starts to fade in when the current one starts to fade out
- select layers or parts by clicking on its card (where the name is displayed)
The Playback Panel

- Play: plays all enabled layers or stops them
- BPM: the number between BPM and Tap is the current BPM. this has effect on the transition speed of layers and parts. You can tap the “Tap” button to set the BPM
- Auto Pilot: enables auto pilot for all layers or disables it. Autopilot moves automatically to the next part when one is finished. Otherwise parts loop and transitions need to be made manually
- Random: when enabled the autoplay is in random order, otherwise sequential
- Windowed: when enabled the current viewport is shown in a small window, otherwise the viewport is shown in the whole application background
Audio Controls

In the Audio panel you can increase or decrease the incoming audio volume with the volume spin box. The “Audio” value indicates the current incoming audio strength.
NDI Controls
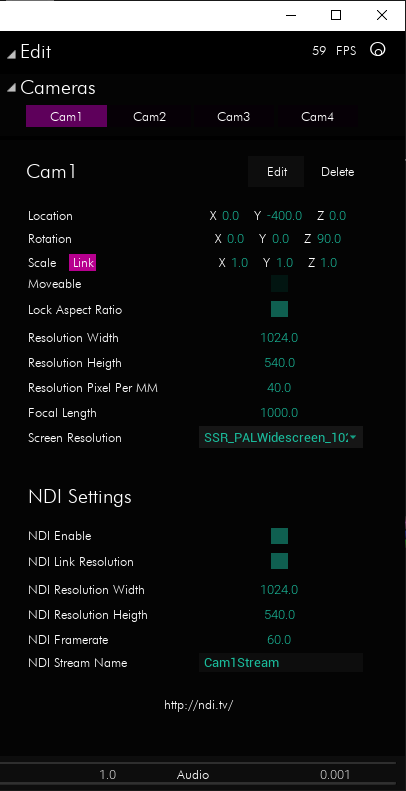
When selecting a camera in the top right panel you can edit it’s NDI properties. By default the NDI output resolution is the same as the viewport resolution. This can be disabled by unchecking “NDI Link Resolution”. Also ensure “NDI Enable” is checked and to set a unique “NDI Stream Name”