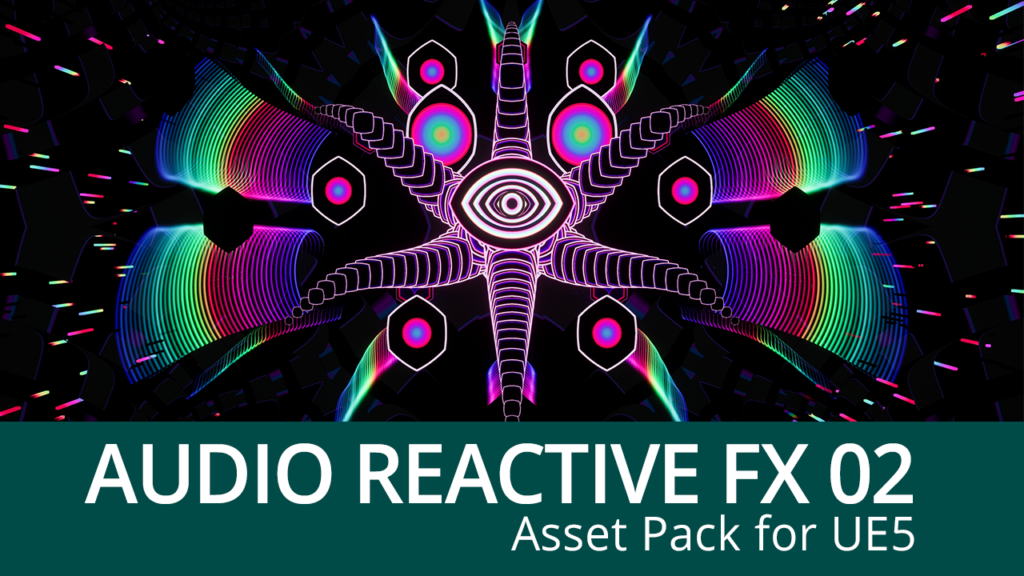
Audio Reactive FX 02 provides a set of audio reactive Niagara particle effects plus a few other Niagara systems that do not react to audio and can be used as filler patterns in a scene. The asset pack was designed to be used for live music events or rendered music videos. The effects can be used out of the box but if you start playing around with it, you will discover sheer endless possibilities. Also contains some utility blueprints for audio capture- and playback.
Unreal Engine Marketplace Link
The asset pack contains a total of 90 Niagara effects (see the full feature list below). The pack is built in a modular fashion with lots of additional Niagara modules, materials and material functions to be reused. Everything is procedural, thus, meshes can easily be replaced by other meshes without the need for UV mapping.
Example Videos
Videos on our YouTube channel use these assets. You can see some examples here. Visit the channel to see more.
Overview video

Demo Video:

Features
- 90 Niagara effects, 17 unique Niagara systems, 73 variations. Each of them having between 20 and 90 parameters for styling.
- 11 reusable Niagara module scripts
- 63 material functions
- 20 materials plus 49 material instances
- The majority of parameters (except things like materials) can be animated in the sequencer.
- The set is based on fractal- and morphing shape materials that are used by Niagara effects
- Audio reactions include: color gradient, emissive, size change, wave motions, animation speed change, spawn rate change
- Most effect have a fixed number of particles. No surprise bursts that drag down performance.
- Most effects run on GPU. Exceptions are ribbon systems as they require CPU access
- Blueprint for audio capture actor. Simply put in your map to enable audio capture. Capture can use everything that is heard or use specific audio mix. Thus it can be enabled for music only or voice chat only etc.
- Blueprint for audio playback that plays automatically in editor and game.
- Blueprint to sample a procedural material to a texture.
Setup
Installation & Contents
After downloading the asset pack. Create a new project or add it to an existing project via the Epic Games Launcher. In both cases you will get a “AudioReactiveFX02” folder in your project which contains the following folders
- Blueprints: contains the 3 tool actors
- LevelSequences: contains the level sequences which were used to render the previews
- Maps: contains 2 maps. The first map contains all effects, created from it’s base Niagara System. In the second map, each effect is replaced by a unique Niagara system. If you want to use the effects in a packaged build, use the effects from the 2nd map.
- Materials: contains procedural materials that are used by the effect assets as well as the used material functions, material instances and color curves
- Meshes: contains the used meshes
- Niagara: contains the actual effects which are Niagara systems. also contains Niagara module scripts
- Sounds: contains a short demo sound loop payed on the demo map
How to use the effects
The demo map in the Maps folder shows how to use the assets. Each asset that reacts to audio has a AudioSpectrum parameter, which has a field to set the submix to be analysed. Submixes are like different audio channels and can provide different audio. For instance, one submix could provide the music, one the sound fx and one a voice chat. If no submix is set, then the project’s master submix is used by default by the effect. If the project is newly created or still has the default settings, this means the effects react to all ingame audio. A few of the effects do not react to audio but match the visual style and are meant to be used together with the audio reactive assets. See the description of the assets below for information on that. the demo map contains one instance of the “BP_AudioPlayer”, which plays a short loop. Thus, music should be hearable and the effects should react to it when the map is opened. The sound can be removed by selecting the “BP_AudioPlayer” actor in the map, then select it’s audio component and clear the sound property.
How to enable audio react from microphone & line-in
- Connect a microphone to your PC (USB or audio plug) or connect an audio source to your PCs line in.
- Open up your project in Unreal Editor or create a new project.
- Drag an “BP_AudioCapture” from the Blueprints/Tools folder into the map. This will instantly enable enable audio capture. This means if you have a microphone connected, the effect should react to your voice. If you have an external audio source on the line in, the effect should react to it. Note that both are possible simultaneously.
- place the audio reactive effects you want in your map. they should now all react to the captured audio.
How to enable audio react from your own audio file
- Open up your project in Unreal Editor or create a new project.
- Add your audio to the project. To do this, drag a supported audio file (WAV, Ogg-Vorbis, AIFF or FLAC) from your file browser into the content browser. You should now have a SoundWave asset in your content browser.
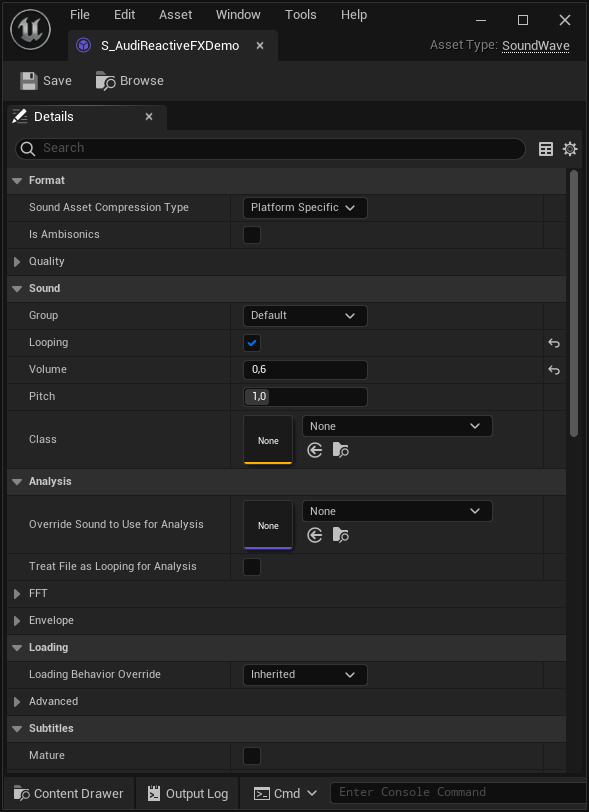
- If you want to make the sound looping, right click the SoundWave asset and select “Edit…”. This opens up the sounds settings like in the following image. Check the “Looping” checkbox and save the SoundWave asset.
- Now drag the “BP_AudioPlayer” blueprint from the content browser into your map. This will create a “BP_AudioPlayer” actor in the map.
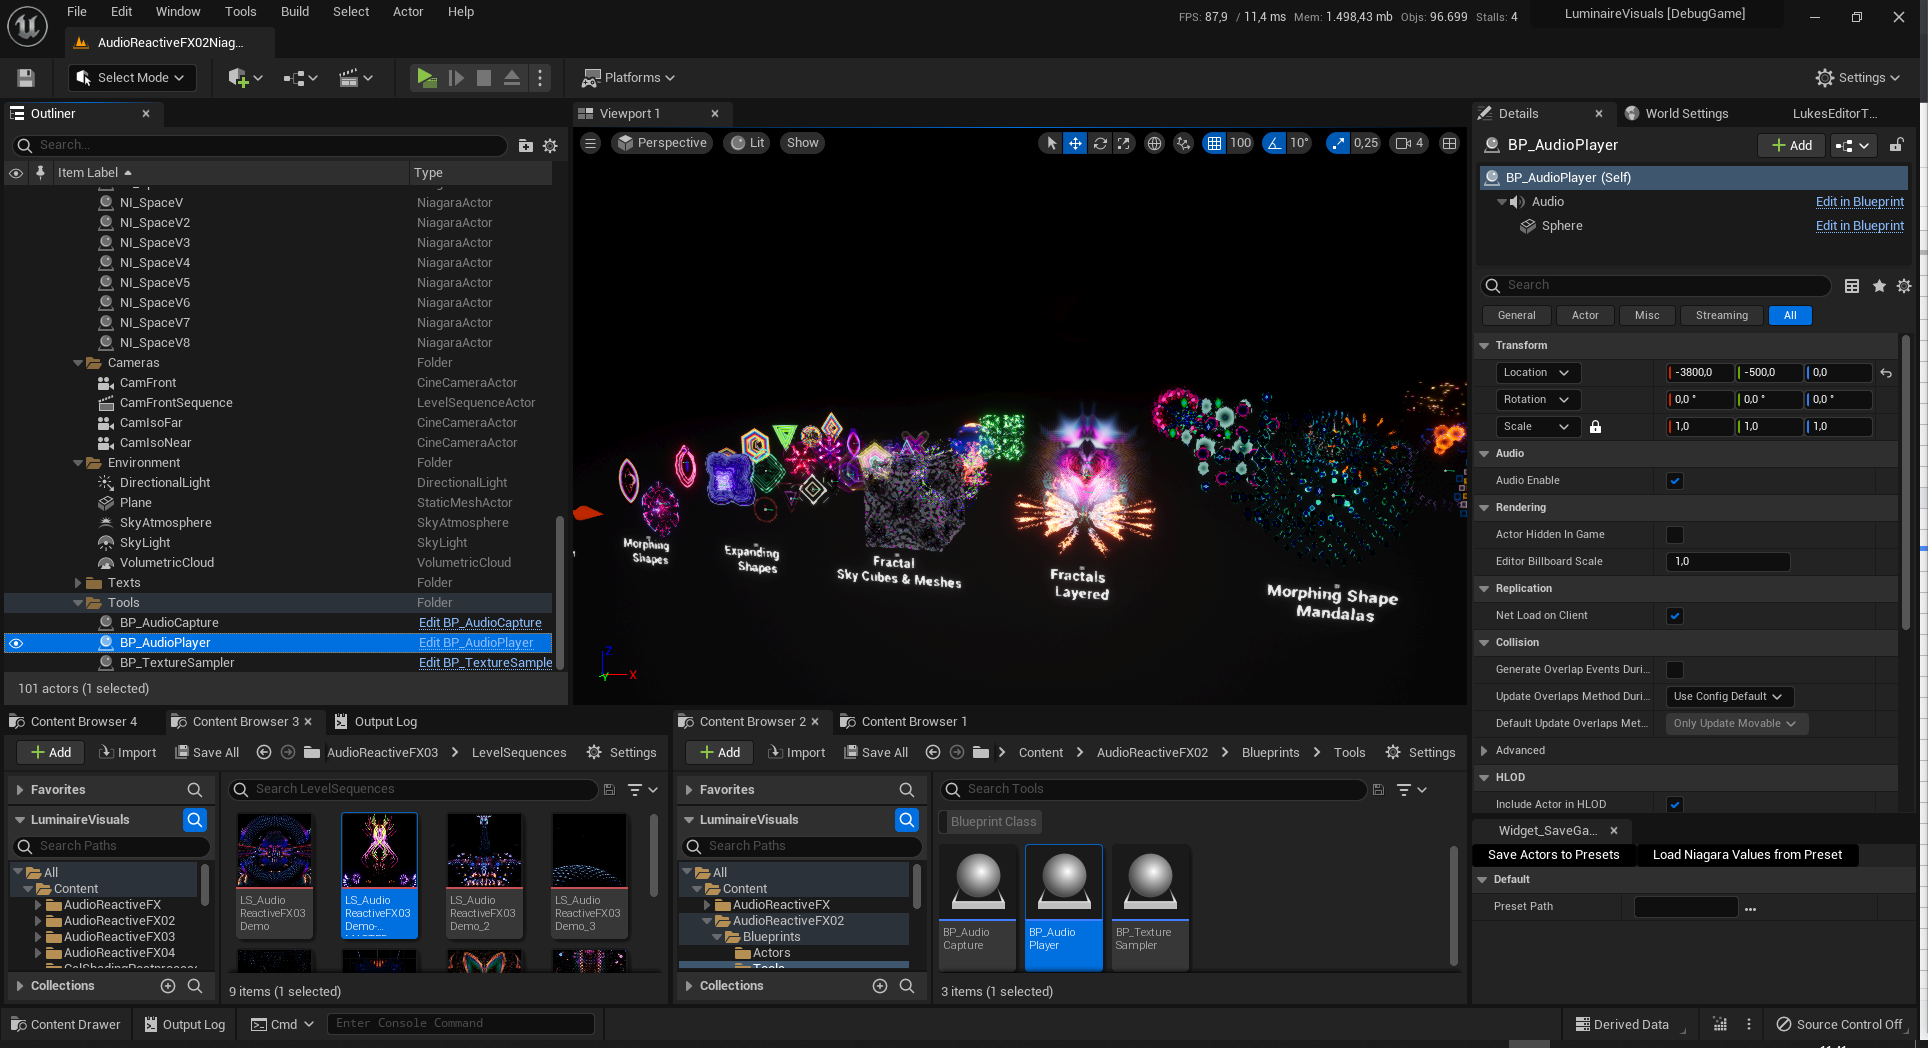
- Select the newly created “BP_AudioPlayer” actor in the map like in this picture, showing the demo map. You can select it in the viewport or from the outliner window.
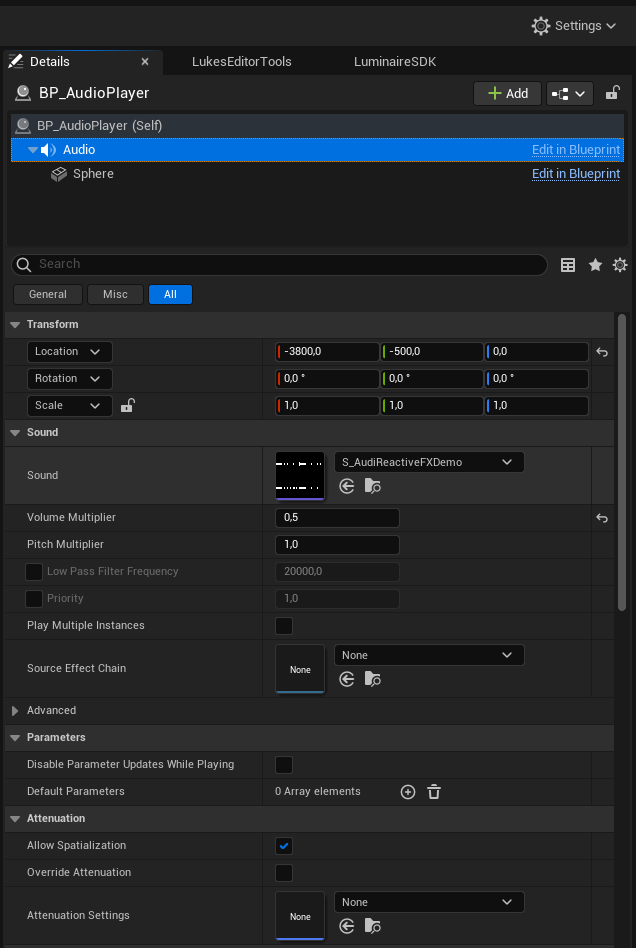
- Now you will see the BP_AudioPlayer’s details in the details panel of the editor like shown in the following image.
- Select the “Audio” component in the details panel like shown in the image. Note the “is UISound” checkbox. If this is enabled, it is always played like a global background sound. This is enabled by default. When disabled the playback has to be started manually. This can be triggered from blueprint, c++ code or other editor tools like the sequencer.
- To set your own audio you can either drag the previously created SoundWave asset from the content browser to the “Sound” property or you can open the dropdown and select one of the supported assets there. The next two images show both ways.


- Once you have set your own audio it will start to play (when the “Is UISound” checkbox is still checked). When the sound is set to be looping, it will play in endless-loop.
- if it does not start to auto play the audio, check the “Is Playing” checkbox of the AudioAnalysisTool actor.
How to enable audio react from in-game sounds
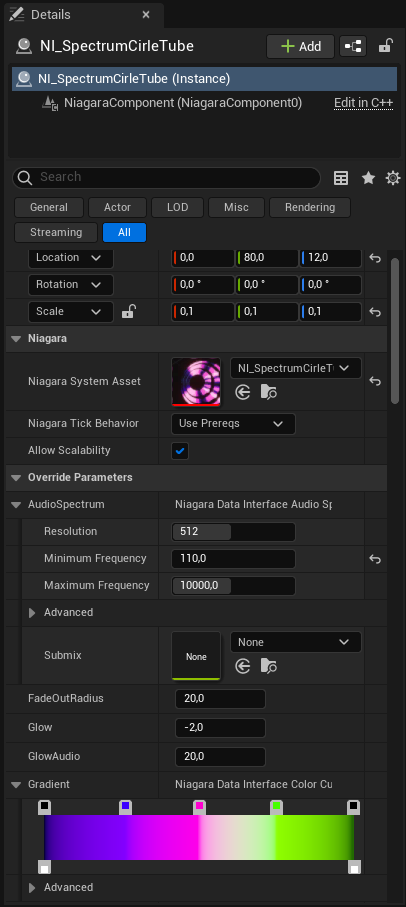
If you want the effects to react to ingame sounds like sound effects and ingame music, you need to set the correct submixes. The analysed submix can be set from the details panel of the effect. Therefor select the effect in the map (from viewport or outliner) and go to the “Override Parameters” section. Then open up the “AudioSpectrum” property to show the “Submix” parameter.
- If you play all music and sounds without a submix set (empty property) or with the project’s default submix, then you don’t need to change the submixes on the audio reactive effects. You can leave the submix parameter inside the AudioSpectrum property of the effect empty and it will automatically listen on the project’s default submix.
- If you divide your ingame audio into different submixes like music, sound effects, voice chat etc. you will need to set the correct submix in the submix parameter inside the AudioSpectrum property of the effect. For instance if you have a MusicSubmix for background music, you can set this MusicSubmix and enable the effect to react to the background music only.
If the effects do not react to audio
- ensure that there is audio in game. you can use the AudioAnalysisTool to playback sounds or to capture audio (see the previous sections)
- check the submixes of the effects. select the effects and expand the AudioSpectrum property. There is a submix parameter. If this is empty, the effect will listen to the master submix that is set in the audio section of the project settings.
- if multiple submixes are used in the game, be sure to select the correct submix for the effects and also be sure that the actual audio sources like music and sound effects send to the correct submix
Common effect parameters
There are some common effect parameters, that are shared by most of the effects. These are
- AudioSpectrum: defines the submix to analyse, spectrum resolution, min and max frequency
- AudioThreshold: the audio amplitude needs to exceed this threshold to have a visual effect. set this to 0.1 or 0.2 to cancel low volume noise if needed
- GradientIndex OR ColorGradient: defines which gradient to use. See the “CurveAtlas_Color_01” in the “Materials/ColorCurves” folder to get the order of gradients. When new gradients are added, change the “NumberOfCurveAtlasCurves” in the “MPC_GlobalMaterialParameters” asset in the “Materials/MaterialParameterCollections” to be the same number as the number of gradients in the atlas. If this is not done, some of the effects might take the wrong gradients.
- GradientMinimum & GradientMaximum: when these are present, they can be used to stretch the used gradient to better fit the audio.
- SpectrumRangeStart & SpectrumRangeEnd: use to set the range of the spectrum analyzer, where 0 corresponds to the MinimumFrequency and 1 to the MaximumFrequency
- Parameters with “Emissive”,”Glow” or “Brightness” have an effect on the glow behavior
- Parameters that start with “SpectrumTo”, or end with “FromAudio” control the effect of the audio spectrum on various other parameters
Note that parameters that end on “_RESET” will need to reset or rebuild the actor ingame if changed at runtime. Otherwise the parameter change will not take effect
Some effects are based on one of the contained Niagara emitters in the Emitters folder. These can be used to create similar effects.
Contained Assets
Tools
- BP_AudioCapture: starts capturing audio from external sources as line-in or microphone when added to the world. Effects can react to the audio.
- BP_AudioPlayer: starts playback of an audio file when added to the world. Effects can react to the audio.
- BP_TextureSampler: When selected in the map, a source material can be set in the details, as well as a target render target. In addition , there is a button in the details to render the material to the render target. this can be used to “bake” complicated materials to textures.
NI_ExpandingMorphShape
Creates a number of layers that move in a sine/cosine pattern. The layers use a material that can be customized directly from the Niagara system. Different patterns and frame types can be selected and they morph from one to another. The audio spectrum has influence on emissive values and various properties of the material.
NI_ExpandingShape
Creates a number of layers that expand from zero to a set maximum. The layers use a material that can be customized directly from the Niagara system. The audio spectrum has influence on emissive values and various properties of the material. The material can easily be replaced by other 2D sprites if the have the same dynamic material inputs and a particle color node.
Fractal Effects
NI_FractalElectric, NI_FractalGalaxy, NI_FractalJungle, NI_FractalPlanes, NI_FractalSalvia, NI_FractalToxic all work the same way but use different fractals.
Creates layers of simple 3D shapes (cube, sphere, pyramid, torus, plane) which have a fractal material applied. The parameters of the fractal can be controlled directly from the Niagara user parameters (override parameters). The audio spectrum can be set to affect the emissive value and various animation properties of the fractal material. New meshes can added easily. The fractal will be displayed in the UV range from [0,0] to [1,1]. This is meant to be used as a skycube.
Mandala Effects
NI_MandalaMorphShape & NI_MandalaShapes use the same mandala formation but use different materials for rendering
Creates particles in a mandala formation where the number of rings, elements per ring can be set as well as the number of elements that are added (or removed) each ring. The mandala has a wave animation. The audio spectrum can have effect on the wave motion, color and emissive properties of the material. Other meshes or sprites can be used instead. In this case it is recommended to copy the particle color node and the dynamic material nodes from the used material to the new material to support audio reactivness.
Tumbling Shapes
NI_MorphShapesTumbling & NI_ShapesTumbling have the same animation but use different meshes and materials.
Creates meshes inside a box volume which float in a given direction and rotate randomly. The particles glow, based on the audio and the morph shape version can change material properties, based on the audio spectrum.
NI_ShapeExplosion
Creates sprites that move outwards from the center point. Sprite materials can be replaced if the new materials also listen to the same dynamic material parameters. The audio spectrum has influence on the glow of particles and on the spawn rate.
NI_SpaceParticles
Creates particles in a torus that move in a set direction. Gives a look like stars are moving by in space. THIS DOES NOT REACT TO AUDIO, but the nodes for audio reactive behavior can be easily be copied from one of the other systems.
NI_SpaceStreaks
Creates particles in a torus that move in a set direction. Gives a look like stars are moving by in space. The audio spectrum has influence on the brightness of particles (emissive value).
NI_SpaceV
Creates layers of meshes that move in a sine/cosine pattern and change width over time. The base setting looks like an eye that opens and closes. Also has an additional mesh that can be shown. Used as the eye’s pupil in the default setting. Shape and other material properties can be controlled directly from the Niagara user parameters. The audio spectrum has influence on the emissive value of the material, as well as some animation properties.